
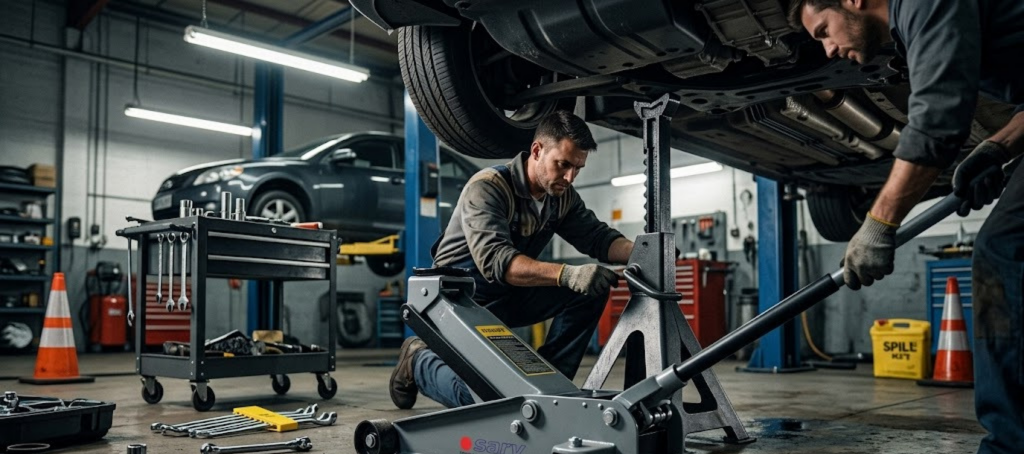
In any fast-paced automotive workshop or commercial service station, vehicle lifting is a routine daily task. However, lifting multi-ton vehicles carries inherent risks if equipment is mishandled or safety protocols are ignored. Knowing how to safely operate hydraulic floor jacks and axle stands is essential for maintaining workshop efficiency, protecting technicians from severe injuries, and preventing costly vehicle damage.
Hydraulic jacks are designed strictly to raise vehicles, while axle stands provide the necessary structural support to hold them securely during maintenance. In this comprehensive guide, we cover pre-operational checks, correct positioning, weight capacity guidelines, and crucial workshop safety practices.
Why Lifting Safety Matters in Busy Workshop Environments
Busy commercial garages are high-activity environments where technicians frequently move between bays, operate power tools, and work beneath elevated vehicles. When under pressure to meet tight delivery deadlines, technicians can easily fall into unsafe habits.
Common Risks Associated with Incorrect Vehicle Lifting:
- Hydraulic Pressure Failure: Hydraulic floor jacks rely on fluid seals. Over time or under excessive loads, internal seals can fail, causing a jack to lower unexpectedly.
- Vehicle Instability: Raising a vehicle on uneven floor surfaces or using incorrect lifting points can cause it to slip off the jack saddle.
- Overloading Equipment: Exceeding the maximum rated capacity of jacks or axle stands leads to structural bending or sudden failure.
- Human Error: Forgetting to engage wheel chocks or failing to double-check axle stand placement before stepping under a vehicle.
Understanding how to safely operate hydraulic floor jacks and axle stands eliminates these hazards and creates a reliable safety culture across your workforce.
Step 1: Pre-Operational Inspection of Lifting Equipment
Before raising any vehicle, a thorough visual and mechanical inspection of both hydraulic jacks and axle stands must be performed. Never assume equipment is safe simply because it worked yesterday.
Inspecting Hydraulic Floor Jacks:
- Check Fluid Levels & Leaks: Look for signs of hydraulic oil pooling around the piston rod, release valve, or pump plunger. Low fluid indicates an internal leak.
- Test the Release Valve: Ensure the release valve opens and closes smoothly. A sticky valve can cause abrupt, uncontrolled lowering.
- Inspect the Saddle & Frame: Check the lifting saddle for excessive wear, cracks, or missing rubber pads. Inspect the steel chassis and castors for structural cracks or bent frames.
- Bleed Trapped Air: If the jack feels spongy or fails to lift to its maximum height, bleed air from the hydraulic system according to the manufacturer’s instructions.
Inspecting Axle Stands:
- Verify Load Capacity Labels: Ensure the weight rating tags are legible and match the weight requirements of the vehicles being serviced.
- Examine Weld Points: Check all structural welds for hairline cracks, rust, or metal fatigue.
- Inspect Locking Mechanisms: For ratchet-type stands, inspect the teeth and locking pawls for wear. For pin-type stands, confirm that the safety retention pin and chain are intact.
- Check Base Alignment: Ensure the base legs sit perfectly flat on the ground without wobbling.
Step 2: Preparing the Workshop Bay and Vehicle
Proper preparation of the work area and the target vehicle is a crucial safety step before positioning any lifting equipment.
Workshop Bay Checklist:
- Clean, Solid Floor Surface: Always operate jacks and stands on a level, solid concrete floor. Never use lifting equipment on asphalt, gravel, or sloped surfaces, as the legs can sink or shift under load.
- Clear Obstructions: Keep the surrounding floor space free of oil spills, air hoses, drop cords, and loose tools that could interfere with positioning.
- Adequate Lighting: Ensure the bay is well-lit so technicians can clearly see designated jack points under the vehicle chassis.
Vehicle Preparation Checklist:
- Park on Flat Ground: Confirm the vehicle is stationary on a completely level surface.
- Engage the Parking Brake: Always set the emergency brake firmly before raising the vehicle.
- Chock the Stationary Wheels: Place heavy-duty wheel chocks behind and in front of the wheels remaining on the ground (e.g., chock the rear wheels if lifting the front axle).
- Clear the Occupants & Keys: Ensure no passengers remain inside the vehicle, and turn off the ignition to prevent accidental movement.
Step 3: How to Safely Position and Operate Hydraulic Floor Jacks
Using a hydraulic floor jack requires precision. Follow these step-by-step instructions to elevate the vehicle safely:
1. Identify Factory Lifting Points
Consult the vehicle owner manual or service guide to locate approved lifting points. Common jack points include:
- Reinforced pinch welds along the side sills.
- Frame rails or crossmembers on body-on-frame trucks.
- Designated suspension mounting points or front subframe locations.
Caution: Never place a jack saddle directly under floor pans, steering linkages, drive shafts, or aluminum oil pans. Doing so can cause catastrophic structural or mechanical damage.
2. Position the Jack Saddle
Roll the floor jack under the vehicle, centering the saddle directly beneath the selected lifting point. Ensure the saddle’s protective rubber pad engages the contact area flush.
3. Close the Release Valve
Insert the jack handle into the valve socket and turn it clockwise until fully closed. Do not overtighten, as this can damage the internal valve seat.
4. Pump to Lift the Vehicle
Pump the handle with smooth, steady strokes. Observe the vehicle closely as it rises:
- Verify that the jack chassis moves slightly on its castors to accommodate the arc of the lift arm.
- If the vehicle shifts or tilts unnaturally, lower it immediately and re-center the saddle.
- Raise the vehicle slightly higher than the intended working height to allow sufficient clearance for insertion of the axle stands.
Step 4: Correct Placement and Engagement of Axle Stands
Golden Rule of Vehicle Lifting: A hydraulic floor jack is a lifting device, NOT a support device. Never place any part of your body beneath a vehicle supported only by a hydraulic jack.
Follow these guidelines for secure axle stand engagement:
1. Match Stands in Pairs
Always use axle stands in matched pairs with identical weight ratings and height settings. Mixing different stand models or heights creates unequal weight distribution and instability.
2. Locate Structural Support Points
Place axle stands directly under solid, structural components approved by the vehicle manufacturer, such as:
- Main chassis frame rails.
- Solid rear axle housings (on rear-wheel-drive vehicles).
- Reinforced subframe members.
3. Adjust and Lock Stand Height
Raise the center column of each axle stand to the required height. Ensure the locking pawl engages securely in the ratchet tooth slot, or insert the safety steel pin fully through the column hole.
4. Lower the Vehicle onto the Stands
Slowly turn the jack release valve counter-clockwise to gently lower the vehicle onto the axle stands:
- Lower the vehicle at a controlled, slow speed—never allow it to drop rapidly.
- Confirm that the support points rest fully centered in the saddle notches of both axle stands.
5. Perform the “Shake Test”
Before crawling under the vehicle, grab a sturdy part of the bumper or body panel and firmly shake the vehicle from side to side. If the vehicle wobbles or shifts on the stands, immediately use the jack to lift it off, recheck stand placement, and re-set the supports.
Step 5: Safe Lowering Procedure After Maintenance
When service work is completed, follow these steps to return the vehicle safely to the ground:
- Clear the Underbody Space: Remove all tools, oil catch basins, creepers, and loose parts from underneath the vehicle. Confirm that no technicians are near the vehicle perimeter.
- Raise the Vehicle Off the Stands: Position the hydraulic floor jack at the primary lifting point, close the valve, and pump the handle until the vehicle rises approximately 1 inch off the axle stand saddles.
- Remove the Axle Stands: Carefully slide the axle stands out from under the vehicle and place them well clear of the working area.
- Lower the Vehicle Slowly: Slowly rotate the jack handle counter-clockwise to release hydraulic pressure. Control the rate of descent until all four wheels rest firmly on the shop floor.
- Disengage Wheel Chocks: Remove the wheel chocks from the stationary tires and store all lifting equipment in designated bays.
Key Differences: Hydraulic Floor Jacks vs. Axle Stands
Understanding the distinct functions of these two tools is vital for workshop safety and compliance.
| Feature | Hydraulic Floor Jack | Axle Stand |
| Primary Purpose | Dynamic vehicle lifting and lowering | Static vehicle support and stabilization |
| Mechanism | Hydraulic fluid pressure & piston pump | Mechanical ratchet or steel safety pin |
| Working Duration | Temporary (Lifting phase only) | Extended (Throughout repair duration) |
| Safety Role | Must be paired with stands before service | Holds vehicle securely during underbody work |
Essential Workshop Rules for Garage Managers
To maintain high safety standards in busy commercial workshops, managers should enforce the following operational guidelines:
- Mandatory Staff Training: Ensure all apprentice mechanics and service technicians undergo formal training on operating hydraulic lifting equipment.
- Annual Equipment Certification: Schedule regular professional inspections, load testing, and maintenance of all hydraulic jacks and jack stands according to local occupational health and safety regulations.
- Observe Weight Rating Limits: Never exceed the Working Load Limit (WLL) stamped on the equipment nameplate. Account for gross vehicle weight, including loaded cargo or toolboxes in commercial vehicles.
- Keep Maintenance Logs: Maintain written records of equipment inspections, seal replacements, and hydraulic fluid flushes for compliance auditing.
Review official workplace safety standards and guidelines via the Health and Safety Executive (HSE) Guide to Vehicle Repair Safety or relevant regional OSHA standards.
5. Call To Action (CTA)
Upgrade Your Workshop Safety Equipment Today!
Are your garage’s hydraulic floor jacks and support stands compliant with current safety standards? Don’t compromise on technician safety or workshop productivity. Equip your service bays with high-capacity, certified hydraulic floor jacks and heavy-duty axle stands engineered for professional performance.
👉 [Browse Our Premium Workshop Lifting Gear Catalog Now!]
Frequently Asked Questions (FAQs)
Q1: Can I leave a vehicle supported only by a hydraulic floor jack while working under it?
No, never crawl under a vehicle supported solely by a hydraulic floor jack. Hydraulic jacks rely on fluid pressure and internal seals that can fail without warning. Always lower the vehicle onto properly rated axle stands before performing underbody service.
Q2: How do I know the weight rating needed for hydraulic jacks and axle stands?
Check the vehicle’s Gross Vehicle Weight Rating (GVWR) on the driver’s side door jamb placard or owner manual. Choose lifting equipment rated to support at least two-thirds of the total vehicle weight for single-axle lifts, or full weight rating for complete vehicle elevation.
Q3: What should I do if my hydraulic floor jack feels spongy or won’t lift fully?
Spongy operation usually indicates air trapped inside the hydraulic fluid system. Open the release valve, rapidly pump the handle several times to purge trapped air from the cylinder, top up with clean hydraulic jack oil if necessary, and re-tighten the filler plug.
Q4: How often should garage lifting equipment be inspected?
Perform visual inspections daily before use to check for oil leaks, cracked welds, or damaged locking pawls. Additionally, conduct detailed monthly inspections and annual professional load testing to maintain compliance with workshop safety regulations.